Everything You Need To Know About Installing an LED Light Bar On Your UTV or Offroad Vehicle
 Having a light bar on your off-roading setup helps keep all things visible during the night.
But installing the light bar (correctly) isn’t as easy as it might seem.
I was inspired to write this blog post after I noticed one of my close friend’s light bar was flickering on and off (the wires weren’t soldered), and being a has-been mechanic myself, I decided to investigate.
So, before you go installing a light bar on your whip, read this quick guide to help you avoid making a mistake that will cost you time (and light) later on.
In this article you’ll learn:
- How to correctly install a light bar on your UTV or truck
- Tools and supplies needed for installing a light bar
- Tips and tricks for doing the job right the first time.
Now, you’ve got your light bar sitting there looking all sexy, ready to install. Now what? You’re going to need an installation kit:
Supplies needed for installing a light bar
Light bar
First, you’ll want to choose your light bar wisely. As far as price goes, you’ll pay anywhere from $20 to $500+ for a light bar. Remember, you get what you pay for. RIGID brand light bars are a popular choice and they run ~$500 a pop, but that doesn’t mean cheaper light bars don’t do the trick just as easily.
My best advice is to scan Amazon and other websites, read reviews, and go from there when buying a light stick for your baby.
Wiring kit
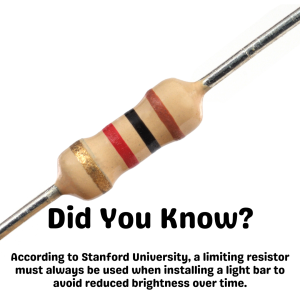
I recommend buying a wiring kit from places like Auto Zone if you don’t already have one. Yes, you can buy the current-limiting resistor, fuse connection, and wiring separately, but it’s a hassle. 
Mounting bolts
Make sure you use lock washers and the correct mounting bolts so your light bar doesn’t come off mid-dunes trip.
Electrical shrink tubing/Heat gun
Look people, electrical tape is not going to cut it! You need to use shrink tubing on your electrical connections to help avoid moisture from penetrating, and also to keep the connection strong when driving over them bumps.
You’ll also need a heat gun for shrinking the tubing onto the wire. Harbor Freight sells economical heat guns (that’s what I use), and I don’t recommend over-spending for this particular tool.
Soldering iron/Soldering kit
Perhaps the biggest failure in light bar installation is not soldering the connections. If you’re not comfortable soldering the connections, ask someone who knows.
Also, make sure you route the wires through the chassis correctly before soldering to avoid having to backtrack!
Miscellaneous tools (drill, screwdrivers, etc.)
You’ll need all the tools you can get when working on your side by side, and for this project you’re definitely going to need an adequate drill bit for making the mounting hole. You’ll also likely need a wrench set for tightening the bolts.
Zip Ties
Don’t forget zip ties! You’ll want them for securing the wiring to the frame.
How To Install A Light Bar (5-Step Guide)
Step 1: Find a good mounting location
Finding the right mounting location key, and for SxS lights you’ll want it somewhere on the top. Do NOT even think about mounting to anything but the frame or a sturdy metal part! Mounting your lights to plastic is a big no-go.
You also need a mounting location for the resistor, and also the switch if your UTV doesn’t already have one hooked up in the dash. A good place to mount the resistor is top center under front hood.
Step 2: Route the wiring
Figure out how you can get the wiring from the battery, to your resistor mounting location, through the chassis to the switch, and up to the light. I recommend using zip ties (do this after you solder) to keep everything in place.
Step 3: Solder and shrink wrap the cables
Now it’s time to solder everything up. Don’t forget to put the shrink wrap on before you solder (this is a common mistake), and make sure you know what you’re doing.
I don’t recommend simply twisting the wires together because they’re going to come off sooner or later. Twist-on wire cap connectors are also not recommended.
After you’ve soldered the wire correctly, slip the heat wrap into place, and use your electric heat gun to make the magic happen. I recommend using two smaller pieces of heat wrap for each wire, and then on larger piece afterward to keep them together (if that makes sense).
Step 4: Connect to battery
Make sure you’ve got a function fuse and resistor, and connect that light up to the battery with the switch in the ‘off’ position.
Step 5: Track test!
Great! Now your light bar should be up and golden. Now it’s time to take it for a night run and see how it fares under the gnarliest of conditions!
Enjoy!
If hope this guide helped you get your light bar dialed. I know I would have appreciated this post when installing mine! Cheers!


